Friday, July 22, 2011

Apricot Basil Shortbread Tart


This is a summertime favourite in our house. We wait for the apricots to come in season and then I whip this little gem together. The crust uses a hard boiled yolk, which is what interested me about this recipe in the first place.

I find this tastes a bit better with a touch of extra salt in the crust and absolutely no more basil than is called for in the recipe. The end result is really pretty - I usually serve it on a dark wooden plate and sprinkle it with a bit of basil for the green colour (I didn't do that in this photo though).

Here's the recipe, which I found online and belongs to Roy Shvartzapel, a pastry chef at Cyrus in Healdsburg, California:

Ingredients
Pastry Cream
  • 1 cup whole milk
  • 5 tablespoon granulated sugar
  • 1/4 cup packed basil leaves with stems
  • 2 large egg yolks
  • 2 1/2 tablespoons cornstarch
  • 2 tablespoons unsalted butter
Pastry
  • 1 hard-boiled egg yolk
  • 1 stick plus 6 tablespoons unsalted butter
  • 1/2 cup confectioners' sugar
  • 1 1/2 cups all-purpose flour
  • 1/4 cup potato starch
  • 1 1/4 teaspoon kosher salt
Topping
  • 6 apricots (1 1/4 pounds), halved
  • 3 tablespoon granulated sugar
  • 1/3 cup apricot jam, melted
Directions
Make the Pastry Cream

In a saucepan, combine 3/4 cup of the milk with the sugar and basil; bring to a simmer. Remove the milk from the heat and let stand for 15 minutes. Remove the basil and squeeze any milk back into the pan; discard the basil.
In a small bowl, whisk the remaining 1/4 cup of milk with the yolks and cornstarch until smooth. Slowly whisk the egg yolk mixture into the warm milk; bring to a simmer over moderate heat, whisking constantly until very thick, 2 minutes. Remove from the heat and whisk in the butter until melted. Scrape the cream into a bowl. Press a piece of plastic wrap directly on the surface and refrigerate until chilled, 2 hours.
Make the Pastry

Preheat the oven to 375 degrees . Spray a 14-by-4 1/2-inch rectangular tart pan with a removable bottom with nonstick cooking spray. In the bowl of a standing mixer, beat the hard-boiled egg yolk with the butter and sugar at medium speed until smooth, about 2 minutes. Add the flour, potato starch and salt and beat at low speed until just combined. Using lightly floured hands, press the dough evenly over the bottom and up the side of the tart pan. Refrigerate the crust for 30 minutes, or until chilled.
Bake the crust for about 25 minutes, until golden. Transfer the crust to a rack and let stand until cooled, about 1 hour.
Make the Topping

Increase the oven temperature to 450 degrees . Line a baking sheet with parchment paper. Arrange the apricot halves cut side up on the paper and sprinkle all over with the sugar. Roast for about 20 minutes, until the apricots are tender and lightly browned. Let the apricots stand until completely cooled, about 30 minutes.
Unmold the crust and transfer it to a serving plate. Using a small offset spatula, spread the cream evenly in the crust. Arrange the apricots on the cream, cut sides down, and brush with the melted jam. Cut the tart crosswise into strips and serve at once.
Notes

To make a 9-inch round tart, press the dough into a 9-inch round fluted tart pan with a removable bottom. Use 10 apricots and 1/4 cup of sugar for sprinkling. Double the pastry cream. Bake for 40 minutes.

Making Room for Baby!


Designing the baby's room was challenging but a good time. After obsessing over EVERY element I decided to make some stuff from scratch, rather than buy. My overall goal was a really sweet room that was definitely 'baby' but not too matchy or too gendered. It was important to have a really minimalist look that felt tied together and had some of the vintage echoes from the rest of the house.

We got the room painted in good old 'Cloud white' (Benjamin Moore) and bought the crib and dresser from Ikea. The curtains are in 'Milk Pail' and they're Martha Stewart. I made all of the art and floor pillows, with the exception of a velvet grey one that I bought, we re-purposed an old vintage chair, and I bought these cute little grey sheep skin rugs for the floor. My friend Rachel bought us a beautiful blanket for our shower and it fit in beautifully with everything.

The pictures where super easy to make:

Take vintage wall paper or scrapbook paper and cut out any shape you want. Glue it to card stock and frame it. How simple is that?? And not pricey at all.

For the pillows, i used the same shapes as I did for the art, and just used fabric paint in the palette of the nursery. Unfortunately, the fabric paint colours dried a little too bright, as compared with how they looked in the bottle. I wanted something a little more muted, but it wasn't the end of the world. I ended up making some chocolate brown elephant pillows for my sister's nursery too - it was a really unique and easy gift!

Whoopie Pies


Cupcakes have been SO popular, macaroons are everywhere in North America and, even marshmallows are now having their day.

But it's the whoopie pie bandwagon I wanted to jump on. Everyone seems to be doing it. Verdict? Tasty but I really don't see what the wild craze is about. It's just a puffy little cookie with some oreo like icing in the middle. Yes, there are a million possibilities in flavour...I get that. Sure, it tastes good - in the way almost all baked goods tend to. Maybe it's nostalgic for some people. And, I suppose they look kind of novel and exciting. Yet, as a baked good item, they really don't do much for me. I'm over it.

Maybe my indifference is the reason that i can't for the life of me find the recipe I used for this! There are TONS online though.

Peach Upside Down Cake


Another first: an upside down cake!

I made this to bring to dinner with Katy and Tim (Charlie's parents) and it was fun to make. This cake was made in the off season - maybe in May? - but peaches are amazing now, so seize the moment!

This recipe came from Style at Home I think. I modified it along the way, but failed to write down what I did...

Ingredients
Topping:

  • 1/4 cup unsalted butter
  • 3/4 cup golden brown sugar
  • 4 ripe peaches, peeled and cut into 8 wedges each

Cake:

  • 11/2 cups all-purpose flour
  • 2 tsp baking powder
  • 1/2 cup unsalted butter
  • 1 cup granulated sugar
  • 2 large free-range eggs
  • 2 tsp pure vanilla extract
  • 1/2 cup 35% cream


Directions
1 Preheat oven to 350ºF.

2 To make the topping, melt the butter in a small saucepan over medium heat. Add the brown sugar and cook for 2 minutes, stirring constantly, until sugar is melted. Pour the mixture into a 9" round cake pan with 2" sides; spread carefully with a spatula to distribute evenly along the bottom of the pan. Place the peaches in a circular pattern to cover the bottom of the pan. Set aside.

3 For the cake, stir together the flour and baking powder in a small bowl. In a large bowl, beat the butter and sugar with an electric hand mixer for 2 to 3 minutes, until the mixture is light and fluffy. Add the eggs one at a time, beating well after each addition. Add the vanilla extract and cream, and beat well until combined. Gently stir in the dry ingredients until just incorporated.

4 Spoon the batter evenly over the peaches in the cake pan. Place the pan on a baking sheet and bake on the centre rack of the preheated oven for 55 minutes, until the top is set and springy. Let the cake cool for 10 minutes before turning out upside down onto a plate. Allow to cool before serving. Serve with softly whipped cream if desired.

Charlie's Bday Cake


Every year I bake Charlie a birthday cake and I always give him the choice of any cake he wants. He never fails to challenge me and this year was no different. he asked for a carrot cake, which i had never made before. Specifically, he asked for a carrot cake injected with some sort of cream cheese icing. I pictured a giant carrot Twinkie (it turns out he was thinking jelly doughnut).

While I hate to disappoint, and I'm all for creative vision, I ultimately decided on a traditional layer cake. I couldn't imagine un-iced single layer cake with icing on the inside that wouldn't be dry. The thought of an iced layer cake that was also injected with icing seemed a little intense. So, sadly, the carrot twinkie was never to be.

Instead, I found this non vegan recipe online:

http://www.epicurious.com/recipes/food/views/Carrot-Cake-with-Maple-Cream-Cheese-Icing-102155

I skipped the maple frosting and used my own cream cheese frosting recipe:

  • 1/2 cup (1 stick) unsalted butter, room temperature
  • 3-4 cups confectioners' sugar (approx - I don't measure)
  • 1/4 cup milk
  • 1/2 teaspoon pure vanilla extract
  • 3/4 of a brick of philly cream cheese
Blend with hand blender and scale up or down in volume depending on preferences!

The cake was a big success and I will definitely make this again and again. I'm a carrot cake maker now!


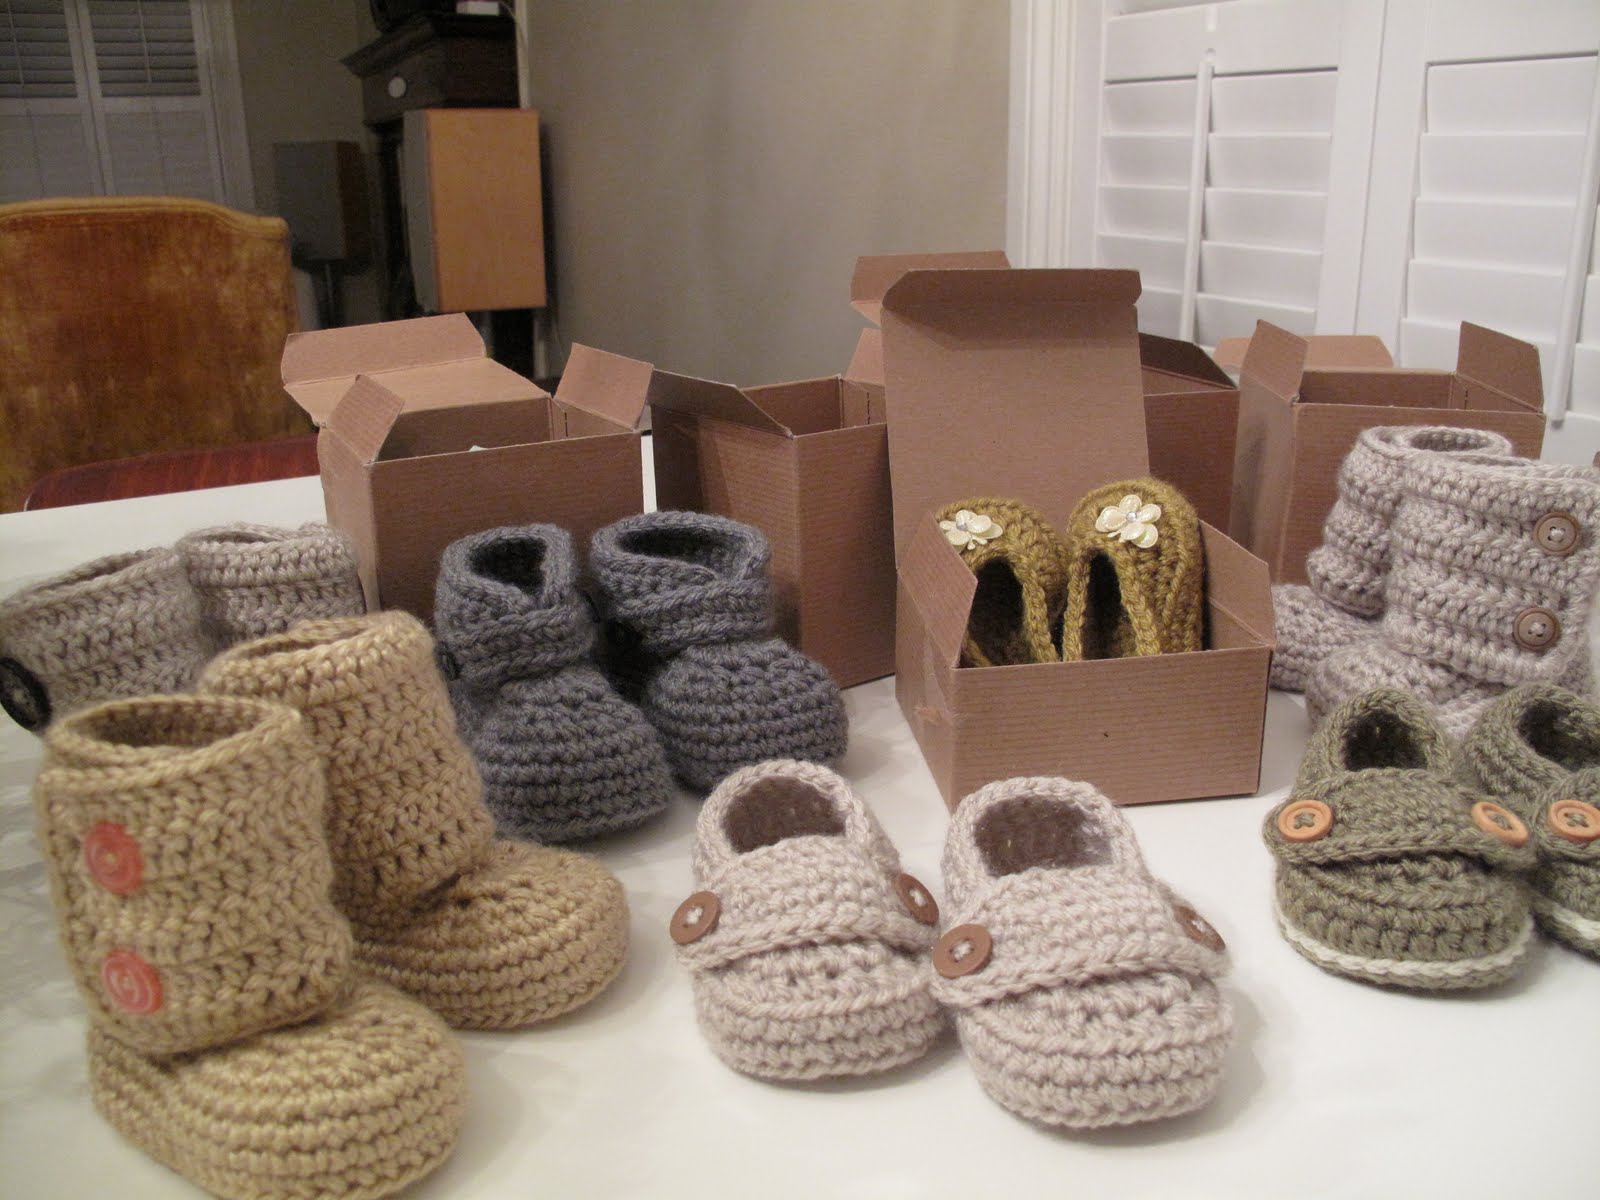
Bootie love


After cruising Etsy for anything crocheted, I found these adorable little hand made booties and baby shoes. They are made by a woman in the states and I haven't seen anything like them in stores. I bought 12 pairs. And a hat. In defense of my sanity (and I know babies don't actually need boots and shoes), I gave away 9 pairs.


Check out the Etsy shop:

http://www.etsy.com/people/JCrochetShop

Can't believe it's July!

Okay, so here's the thing...I've actually been blogging all this time - in a way. I've been saving up pictures and ideas and just never got around to posting. As a result, I've got a lot to post today :)

Since my last post I became pregnant and am getting really close to the big day! Suddenly nursery decor has become a real focus and I've been doing some crafting for the baby's room. As usual, I've been baking up a storm (and eating up a storm...)